Implementing an Auth0 Client Application from Scratch (OAuth Web Message Response Mode - Part 2)
In part one
we explored how the OAuth response mode web_message works and how it is using the post message
web API to return the authorization code to the client application.
In this second part I want to show how this works in detail. For demonstration purposes, we will implement an OAuth client application from scratch using Auth0 as an authorization server.
The final result can be found here: https://githubjakob.github.io/oauth-web-message-debugger/
To gain some better understanding, we will not use the Auth0 Javascript SDK, but implement all the required steps for the OAuth / OIDC authentication flow ourselves.
There are a couple of demo applications out there for debugging OAuth auth servers:
- For example, the OAuth Playground is really useful for understanding the basics behind OAuth and different OAuth flows.
- Also, OAuth Debugger is a nice little tool to interact with your authorization server
- without implementing it in your actual application.
But I could not find one that supported the web_message response mode. So let’s implement our own OAuth client!
In part one we already gave a high level description of the required steps:
- The client application opens the popup with the link to the authorization server.
- Our application will start listening to the post message event.
- The user authenticates in the popup.
- The authorization sends the authorization code back to our application via the post message event.
- Our application receives the authorization code and exchanges it for the access and id token.
You can find the full implementation here and follow along in the code, while we go through each of the steps:
https://github.com/githubjakob/oauth-web-message-debugger
Implementation of the OAuth client application
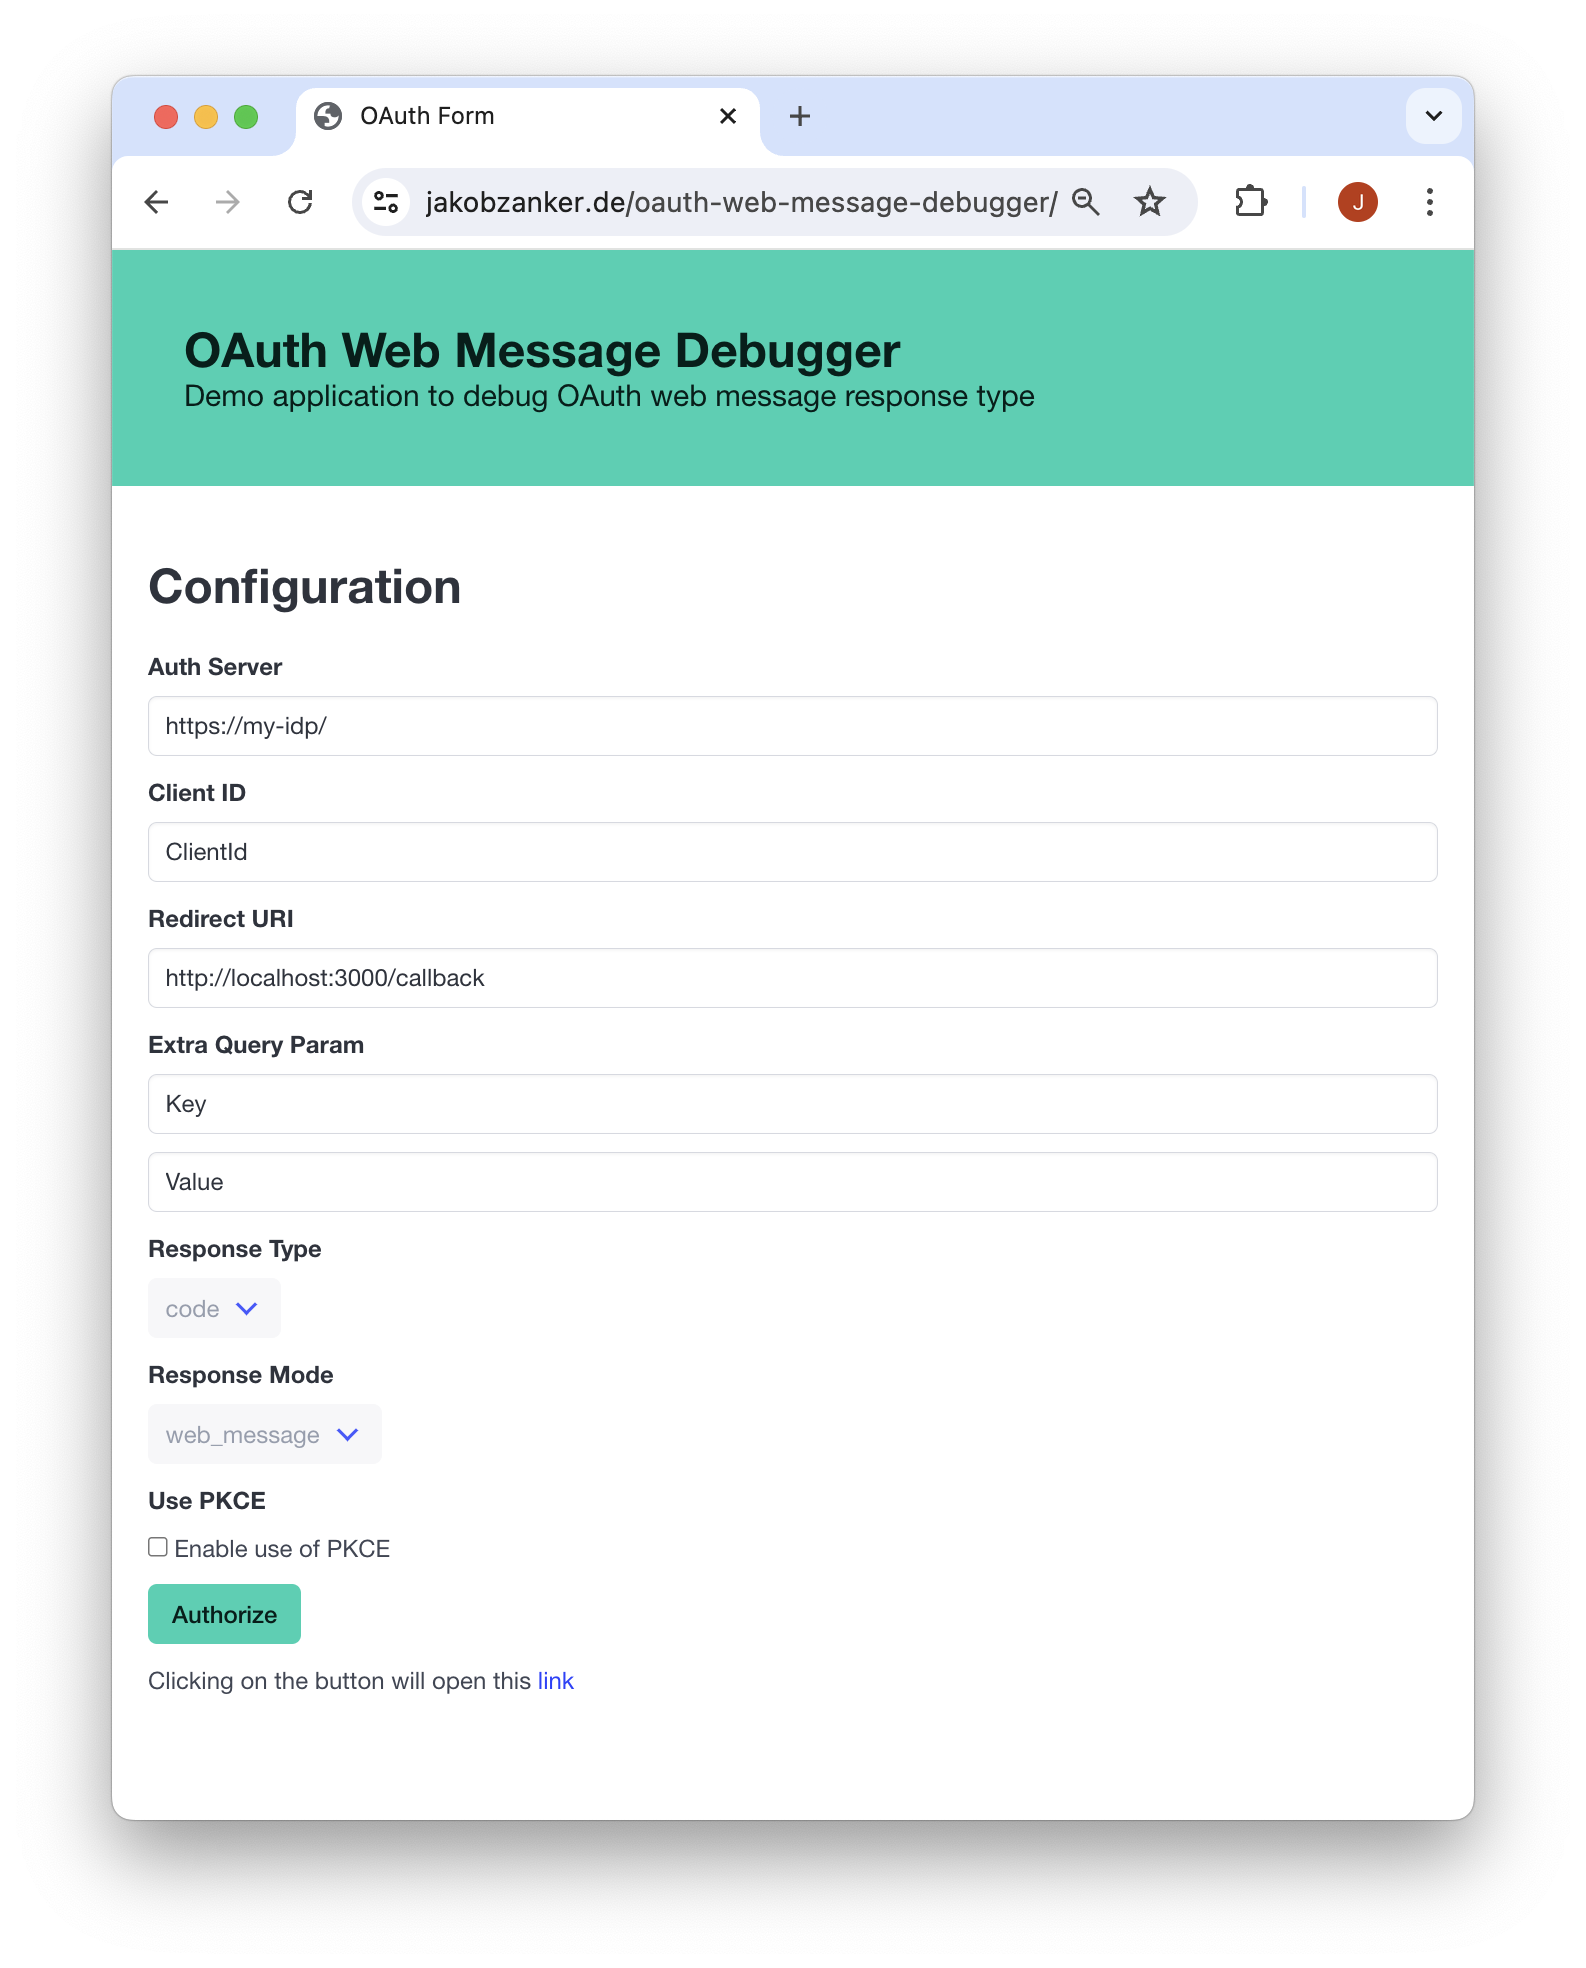
We will build a demo application for debugging purposes and integrate it with Auth0 as auth provider.
Building the url to the authorization server
The first step is to build the URL to the authorization server to start the flow.
The standard defines only two required arguments for the authorization url:
response_typemust be set tocode.client_id
Opening the Link in a popup
The next step is easy: We open the URL in a popup
window.open(url, 'childWindow', 'width=600,height=400');
Subscribing to the message event
Now we need to register for the post message event. In the web_message response mode the auth server will send us the response via this event:
window.addEventListener('message', (event) => {
    console.log("Message", event?.data)
});
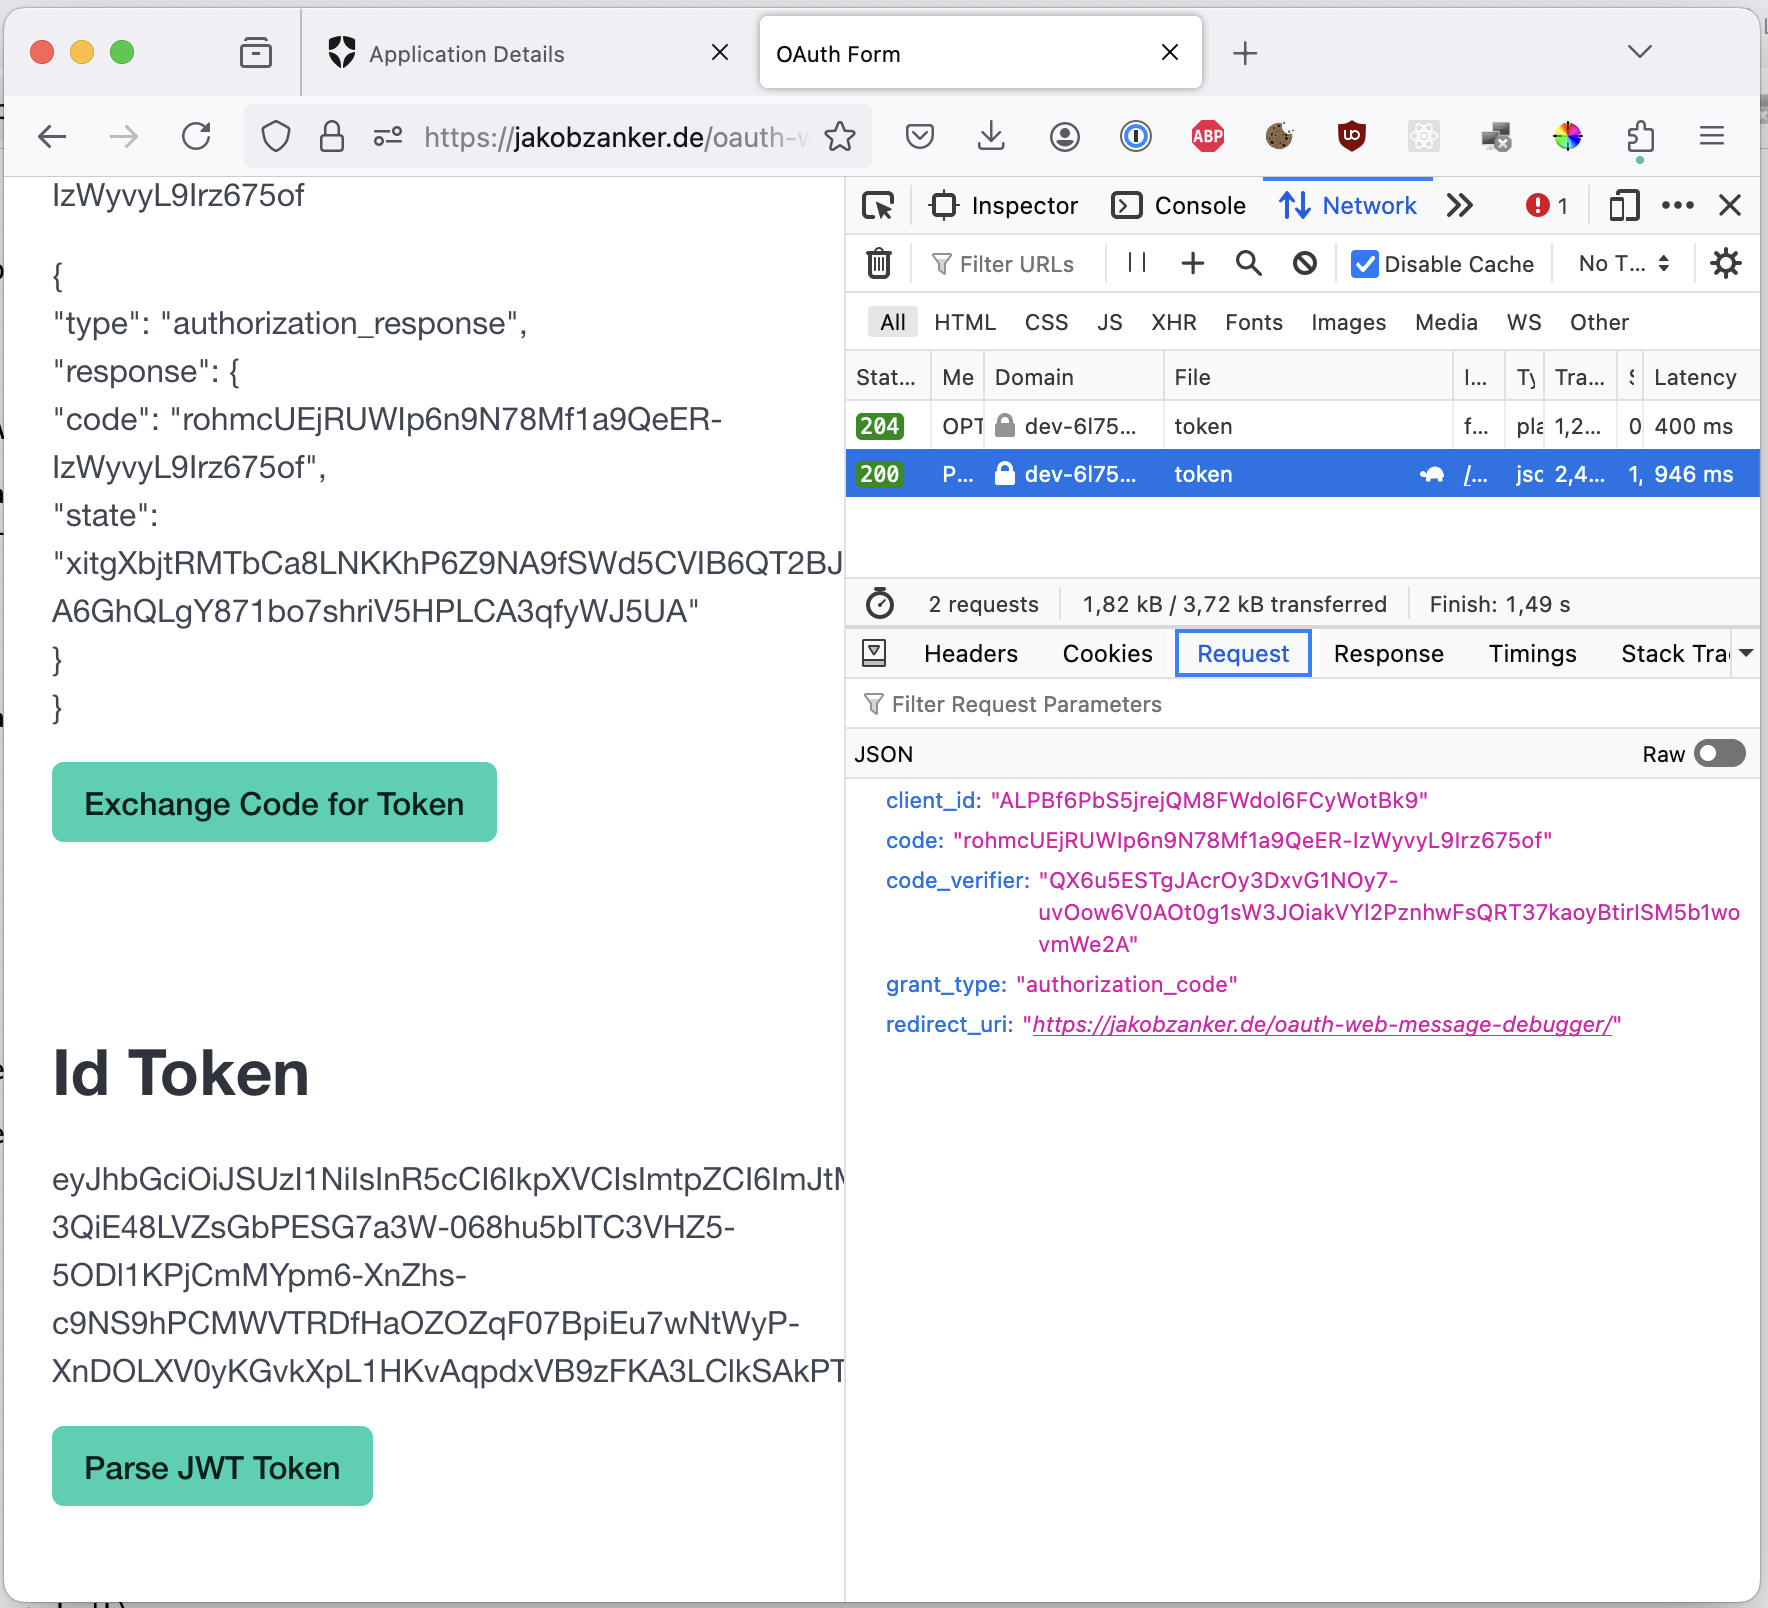
Code Exchange
Since we use the code we need to exchange the authorization code that we received via the message event to get
the access, refresh and id token.
Again, the standard defines the POST endpoint and the required payload for the token exchange: /oauth/token
-
grant_typeREQUIRED. Value MUST be set to “authorization_code”. -
codeThe authorization code received from the authorization server. -
redirect_uri -
client_id
The response of this request will contain the access, refresh, and id token.
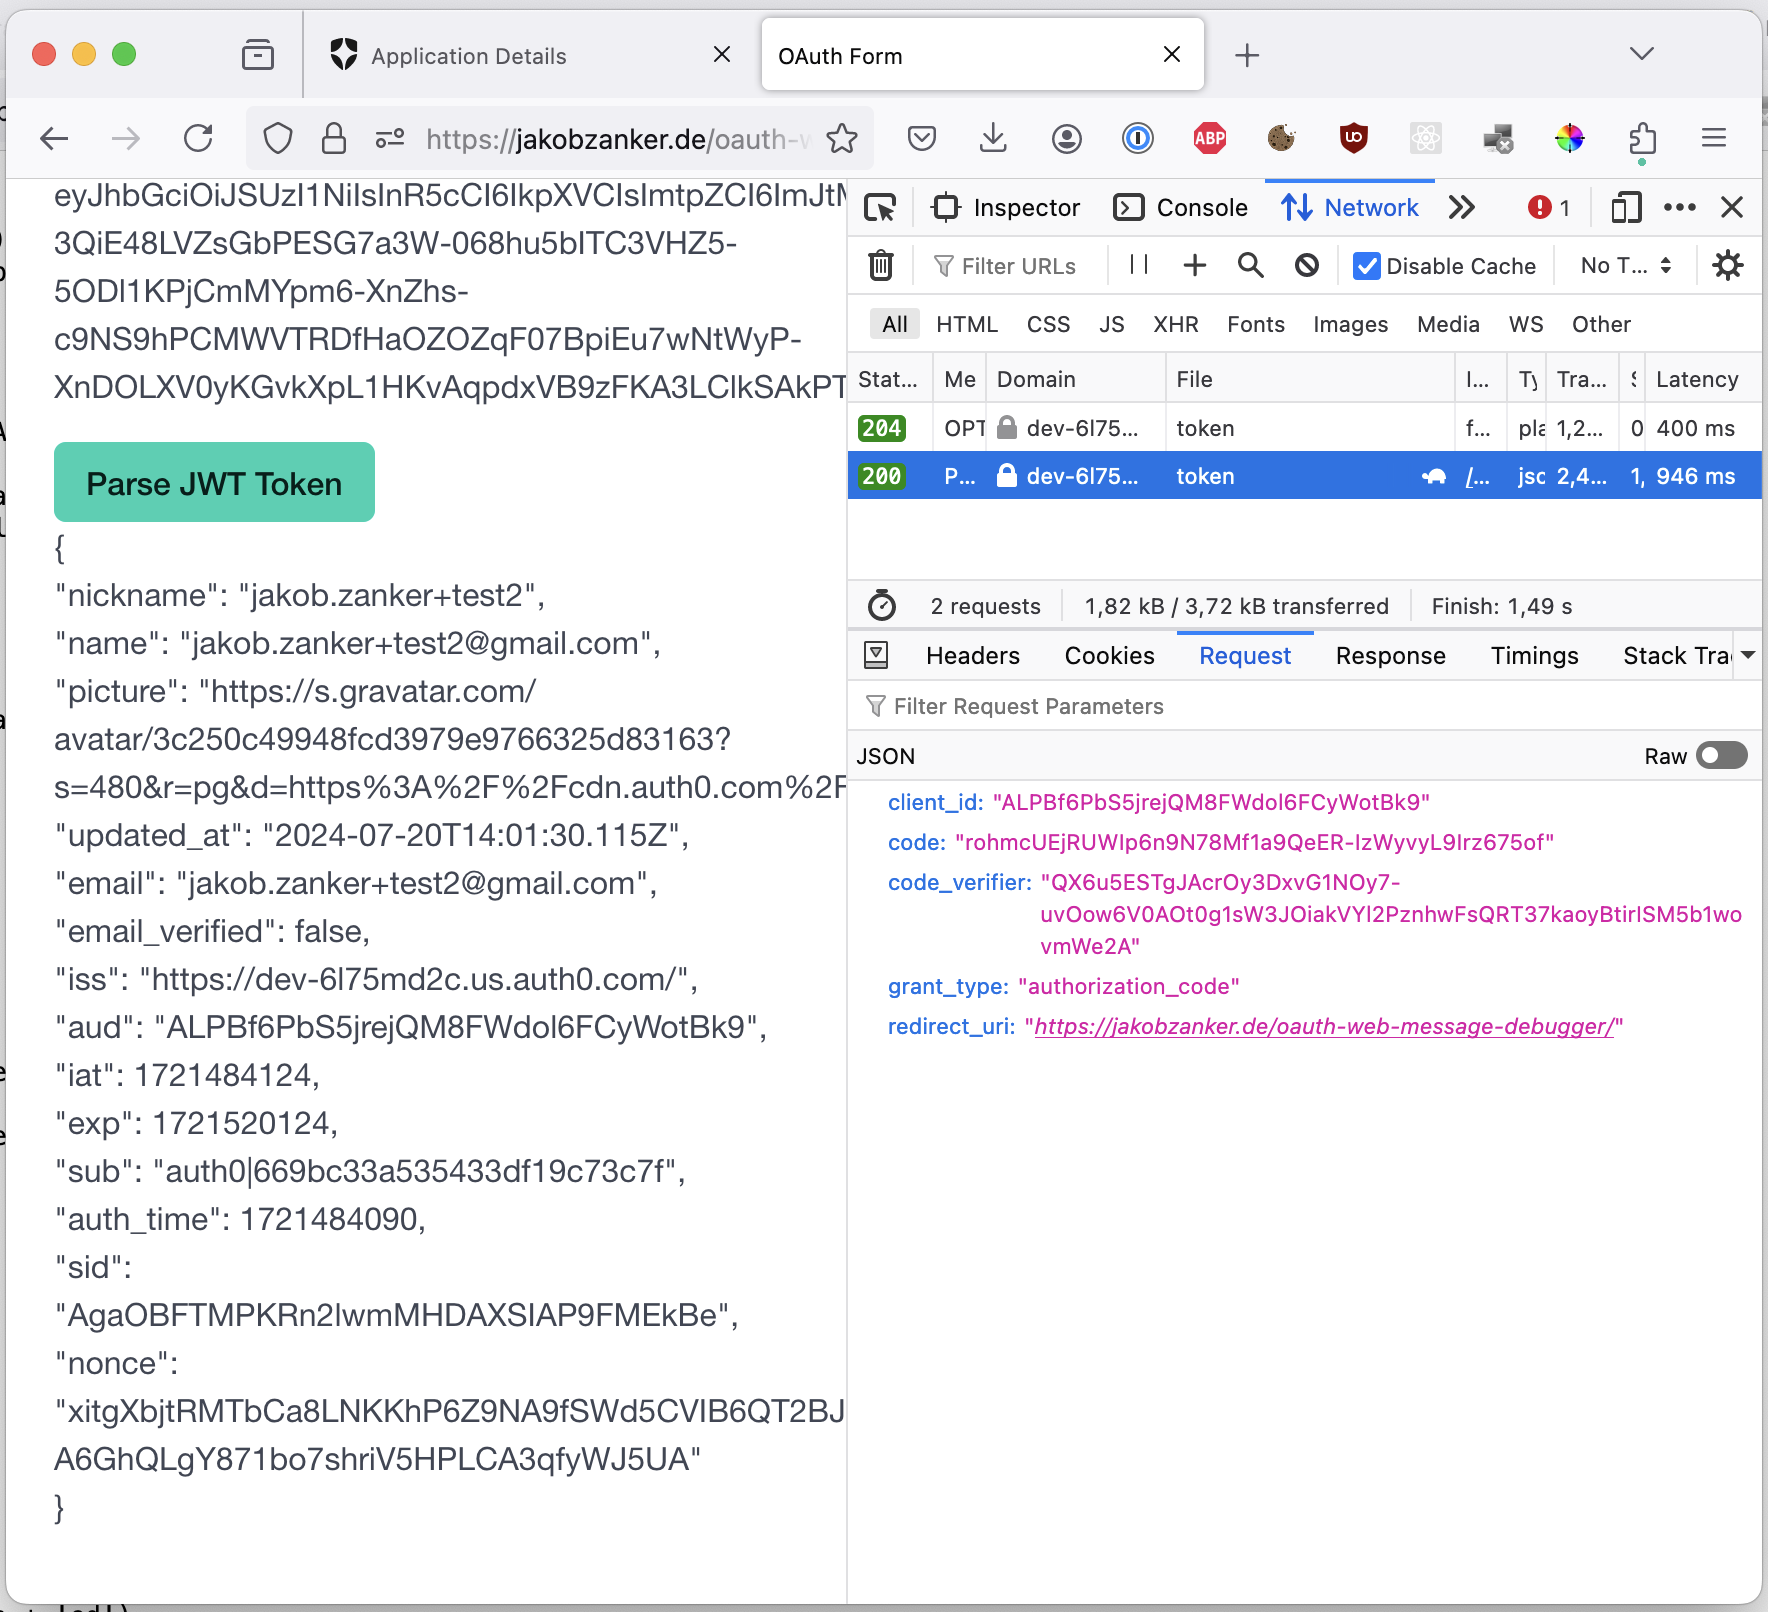
Parse the ID Token
The following is optional, but it makes sense if we want to look into the data we get back from the auth server /token endpoint: we need to decode the JWT tokens.
To do this, we can head over to https://jwt.io/#debugger-io and paste the token there.
Et viola, we completed the flow!
Testing the implementation with Auth0
Now let’s test the implementation with Auth0.
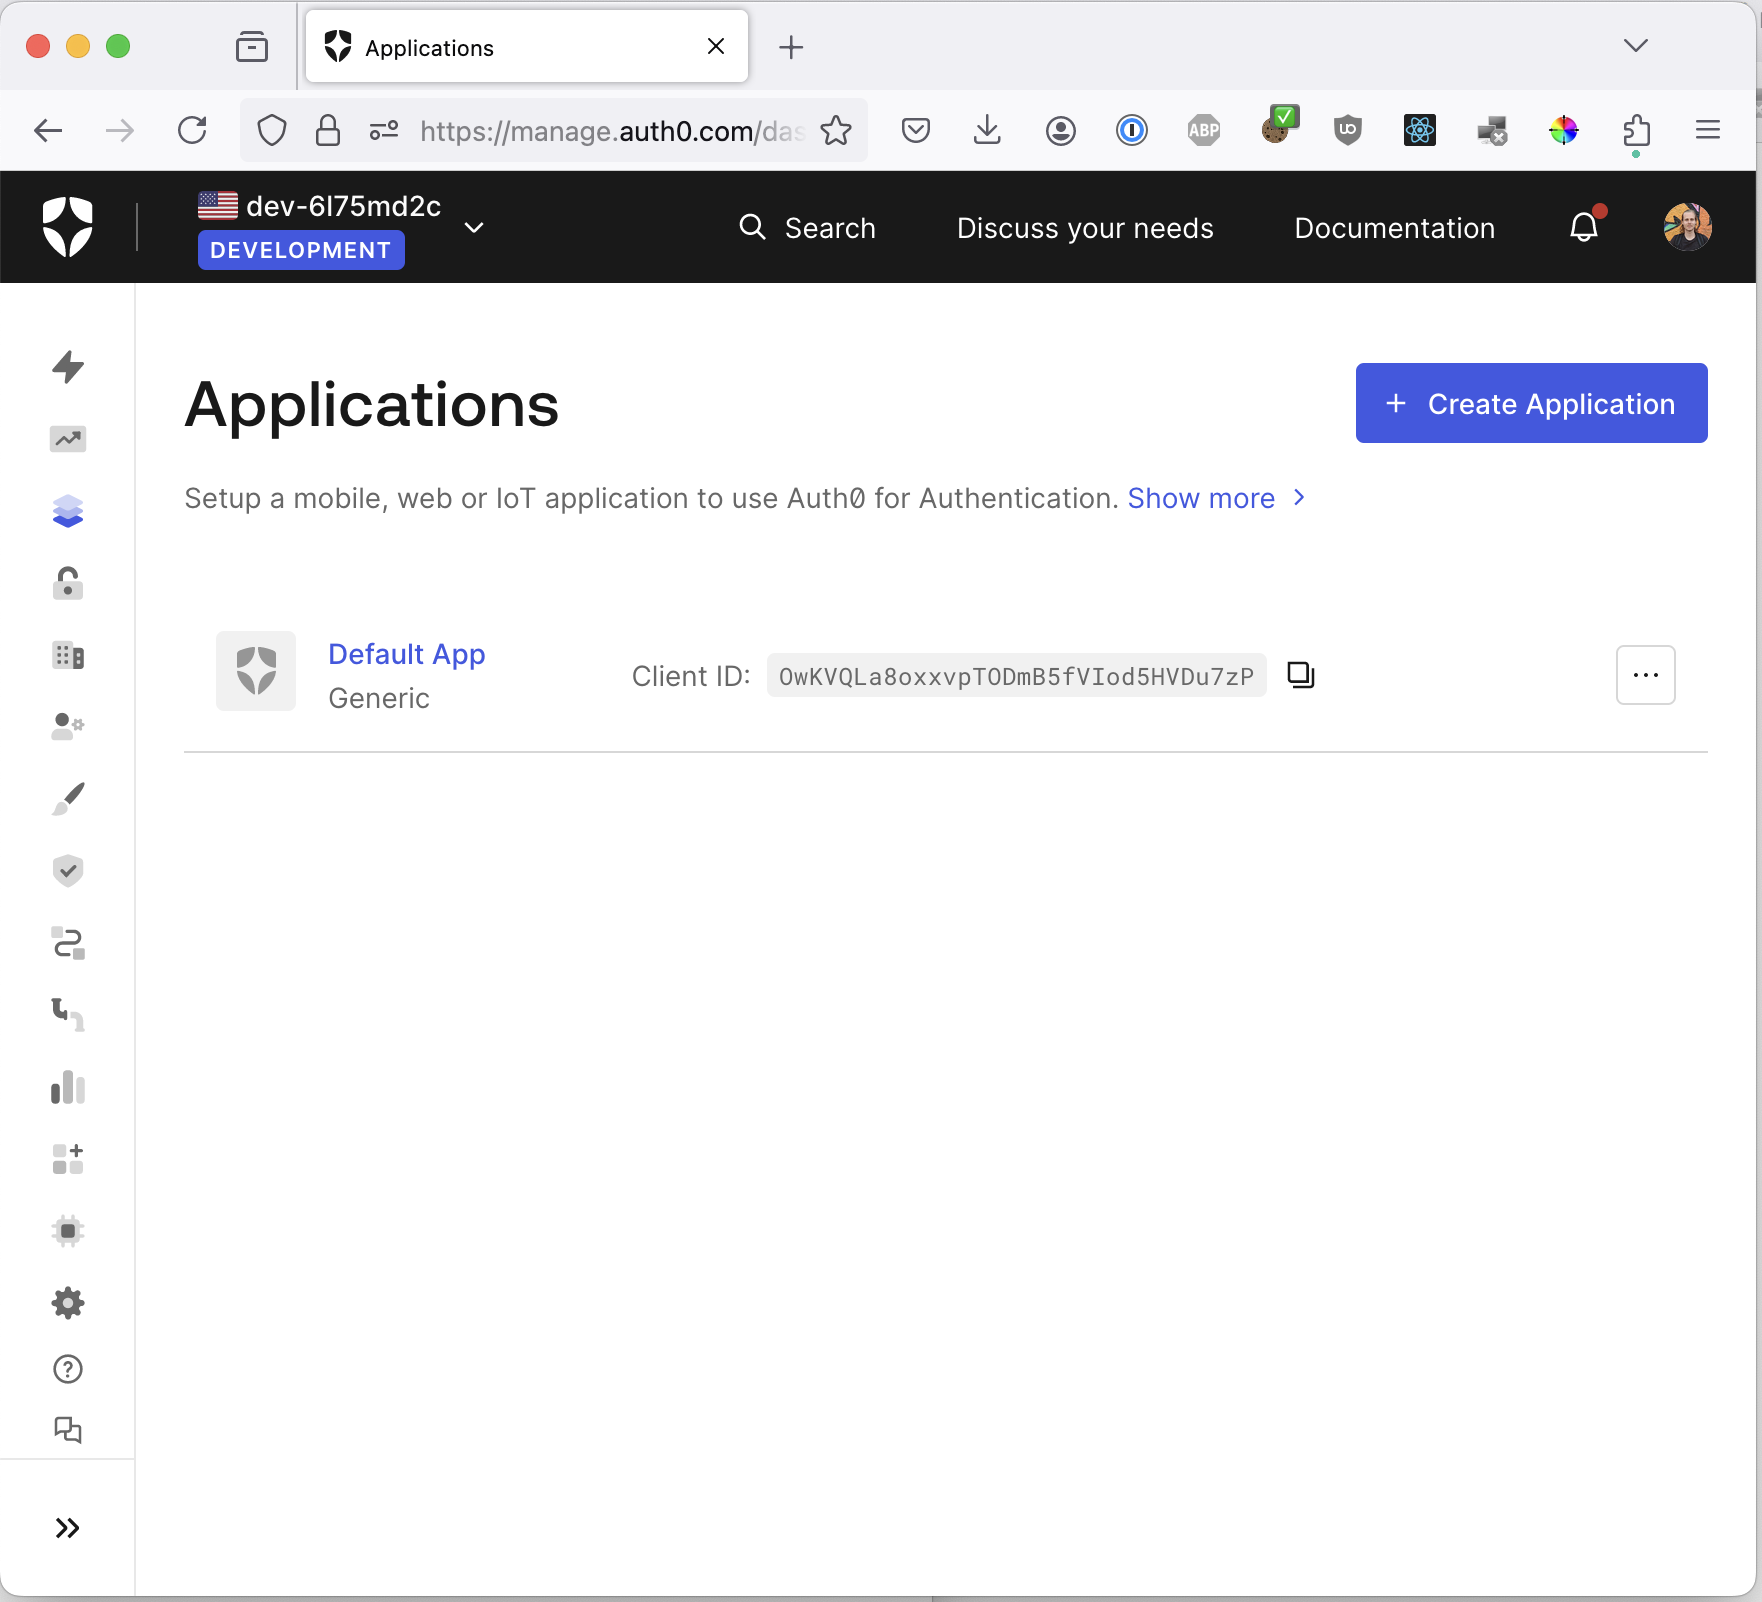
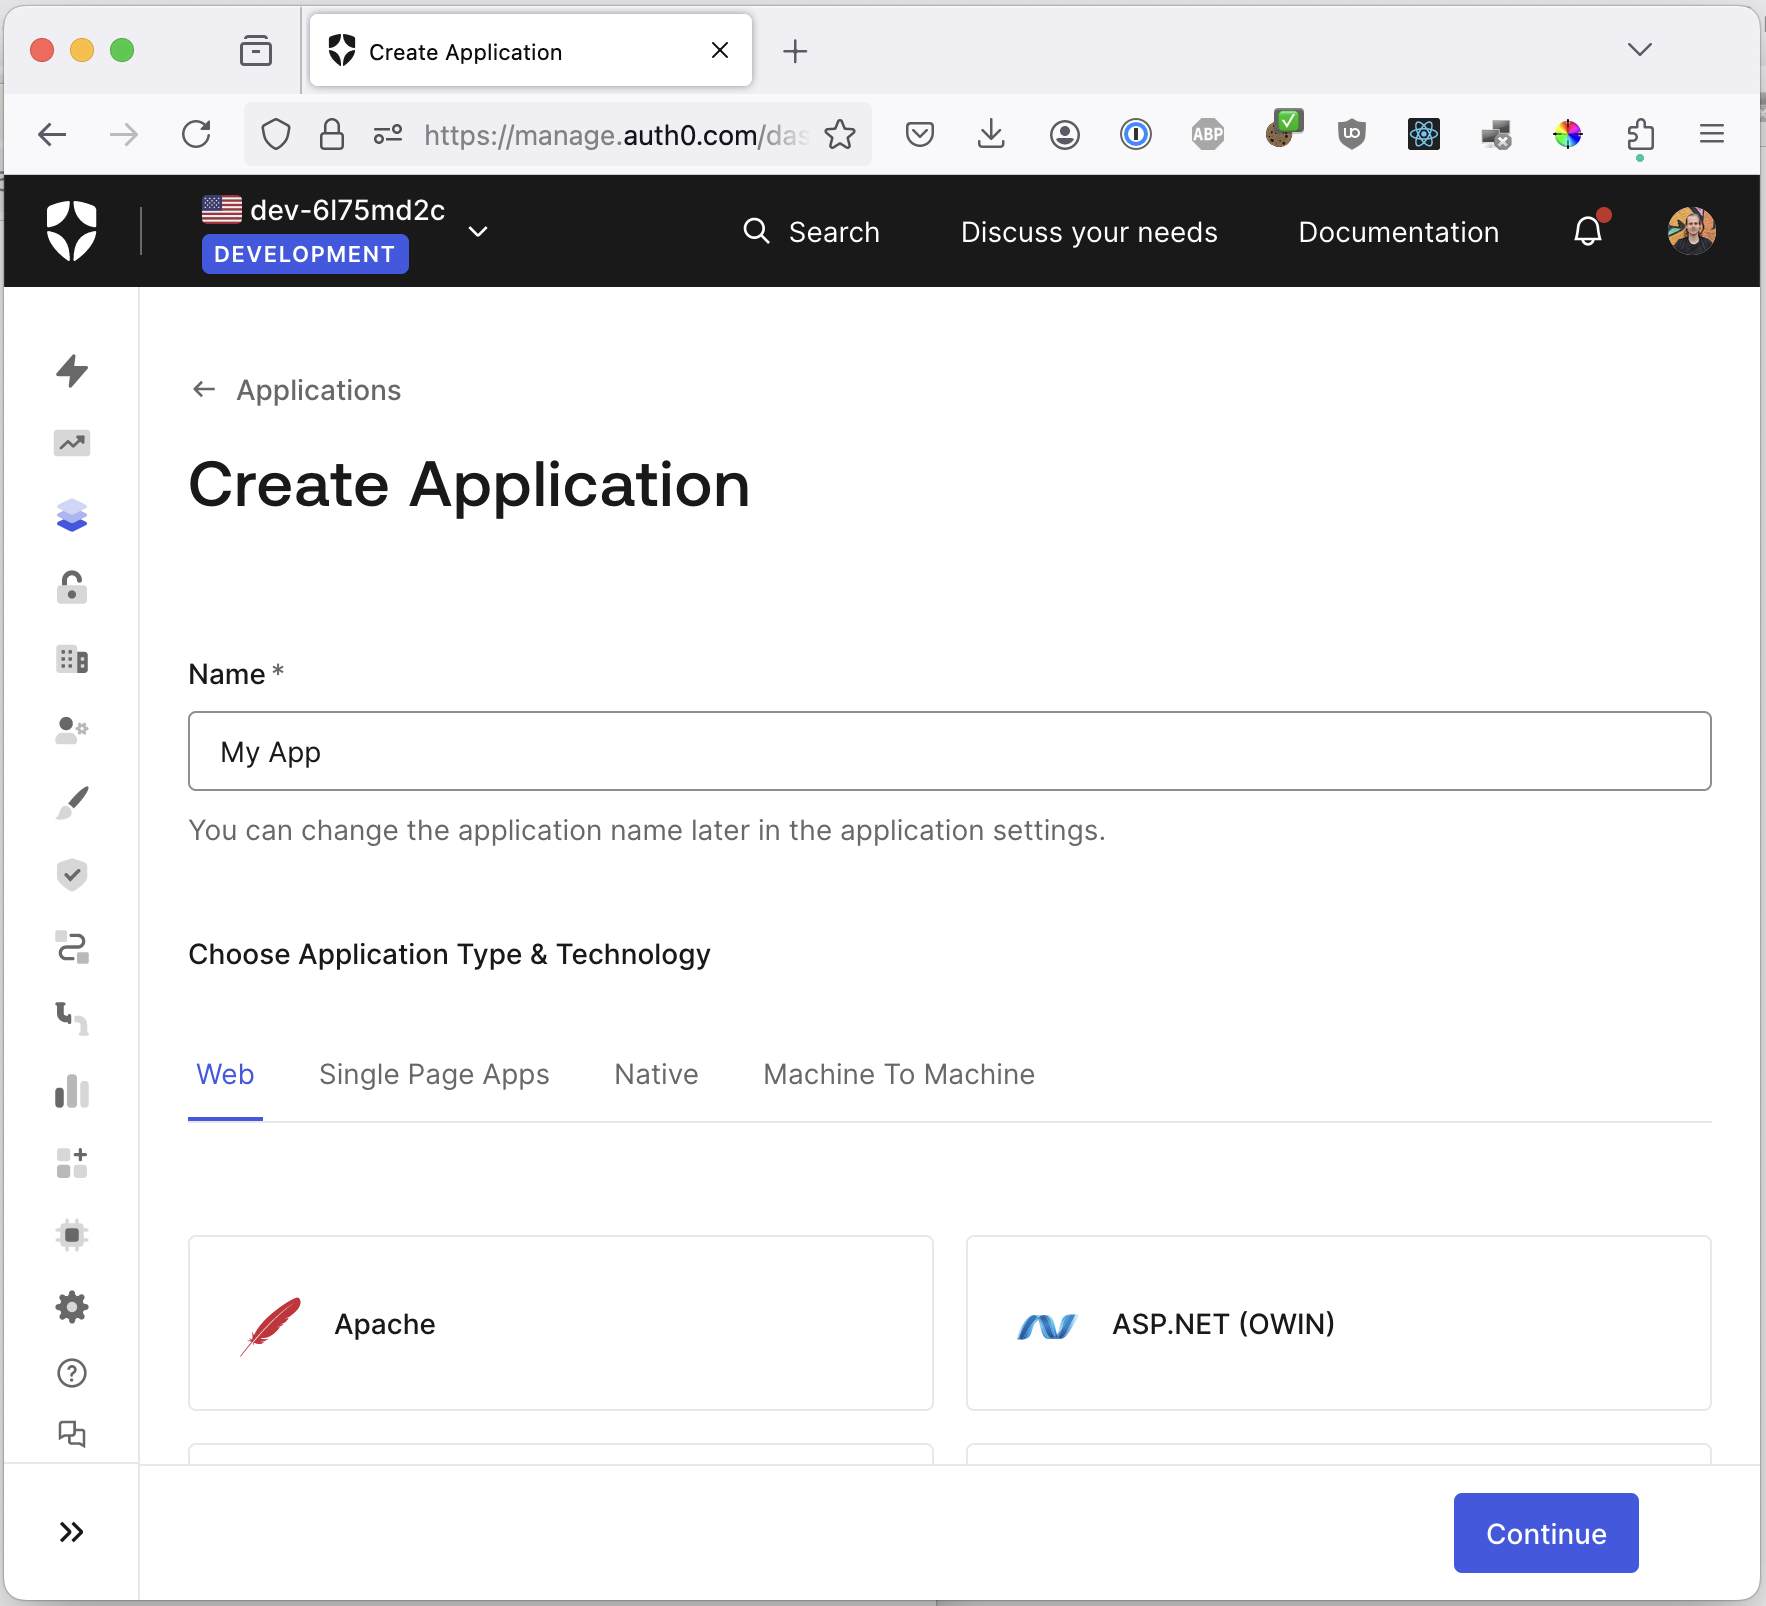
We need to create an application in Auth0 and configure a few options.
After registration and signup in Auth0 we need to create an application:
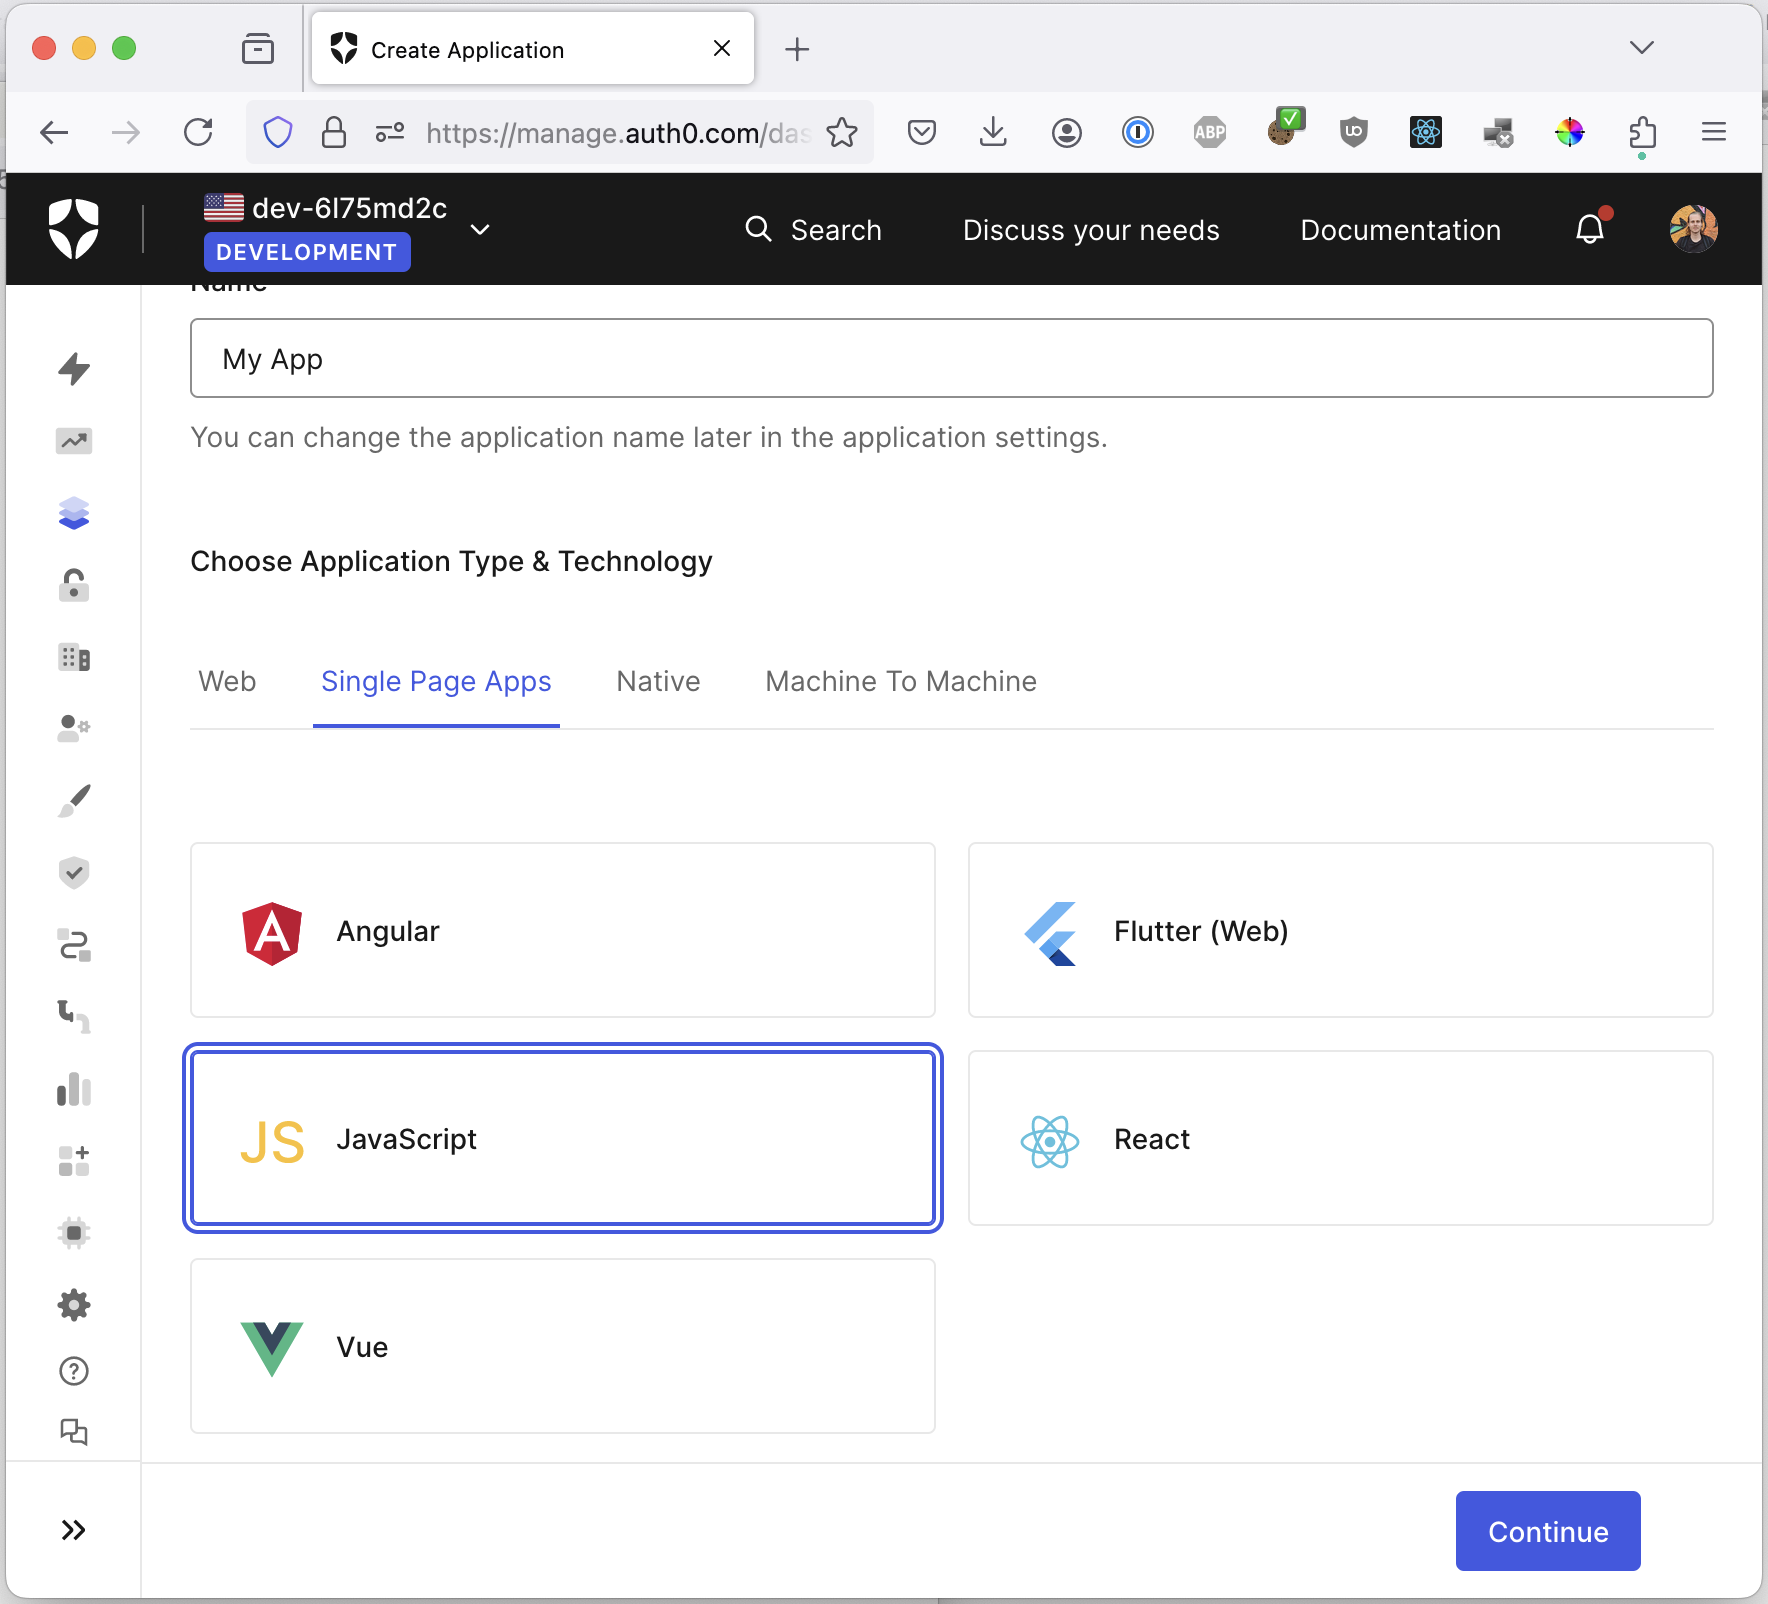
For our purpose, we select “Javascript”:
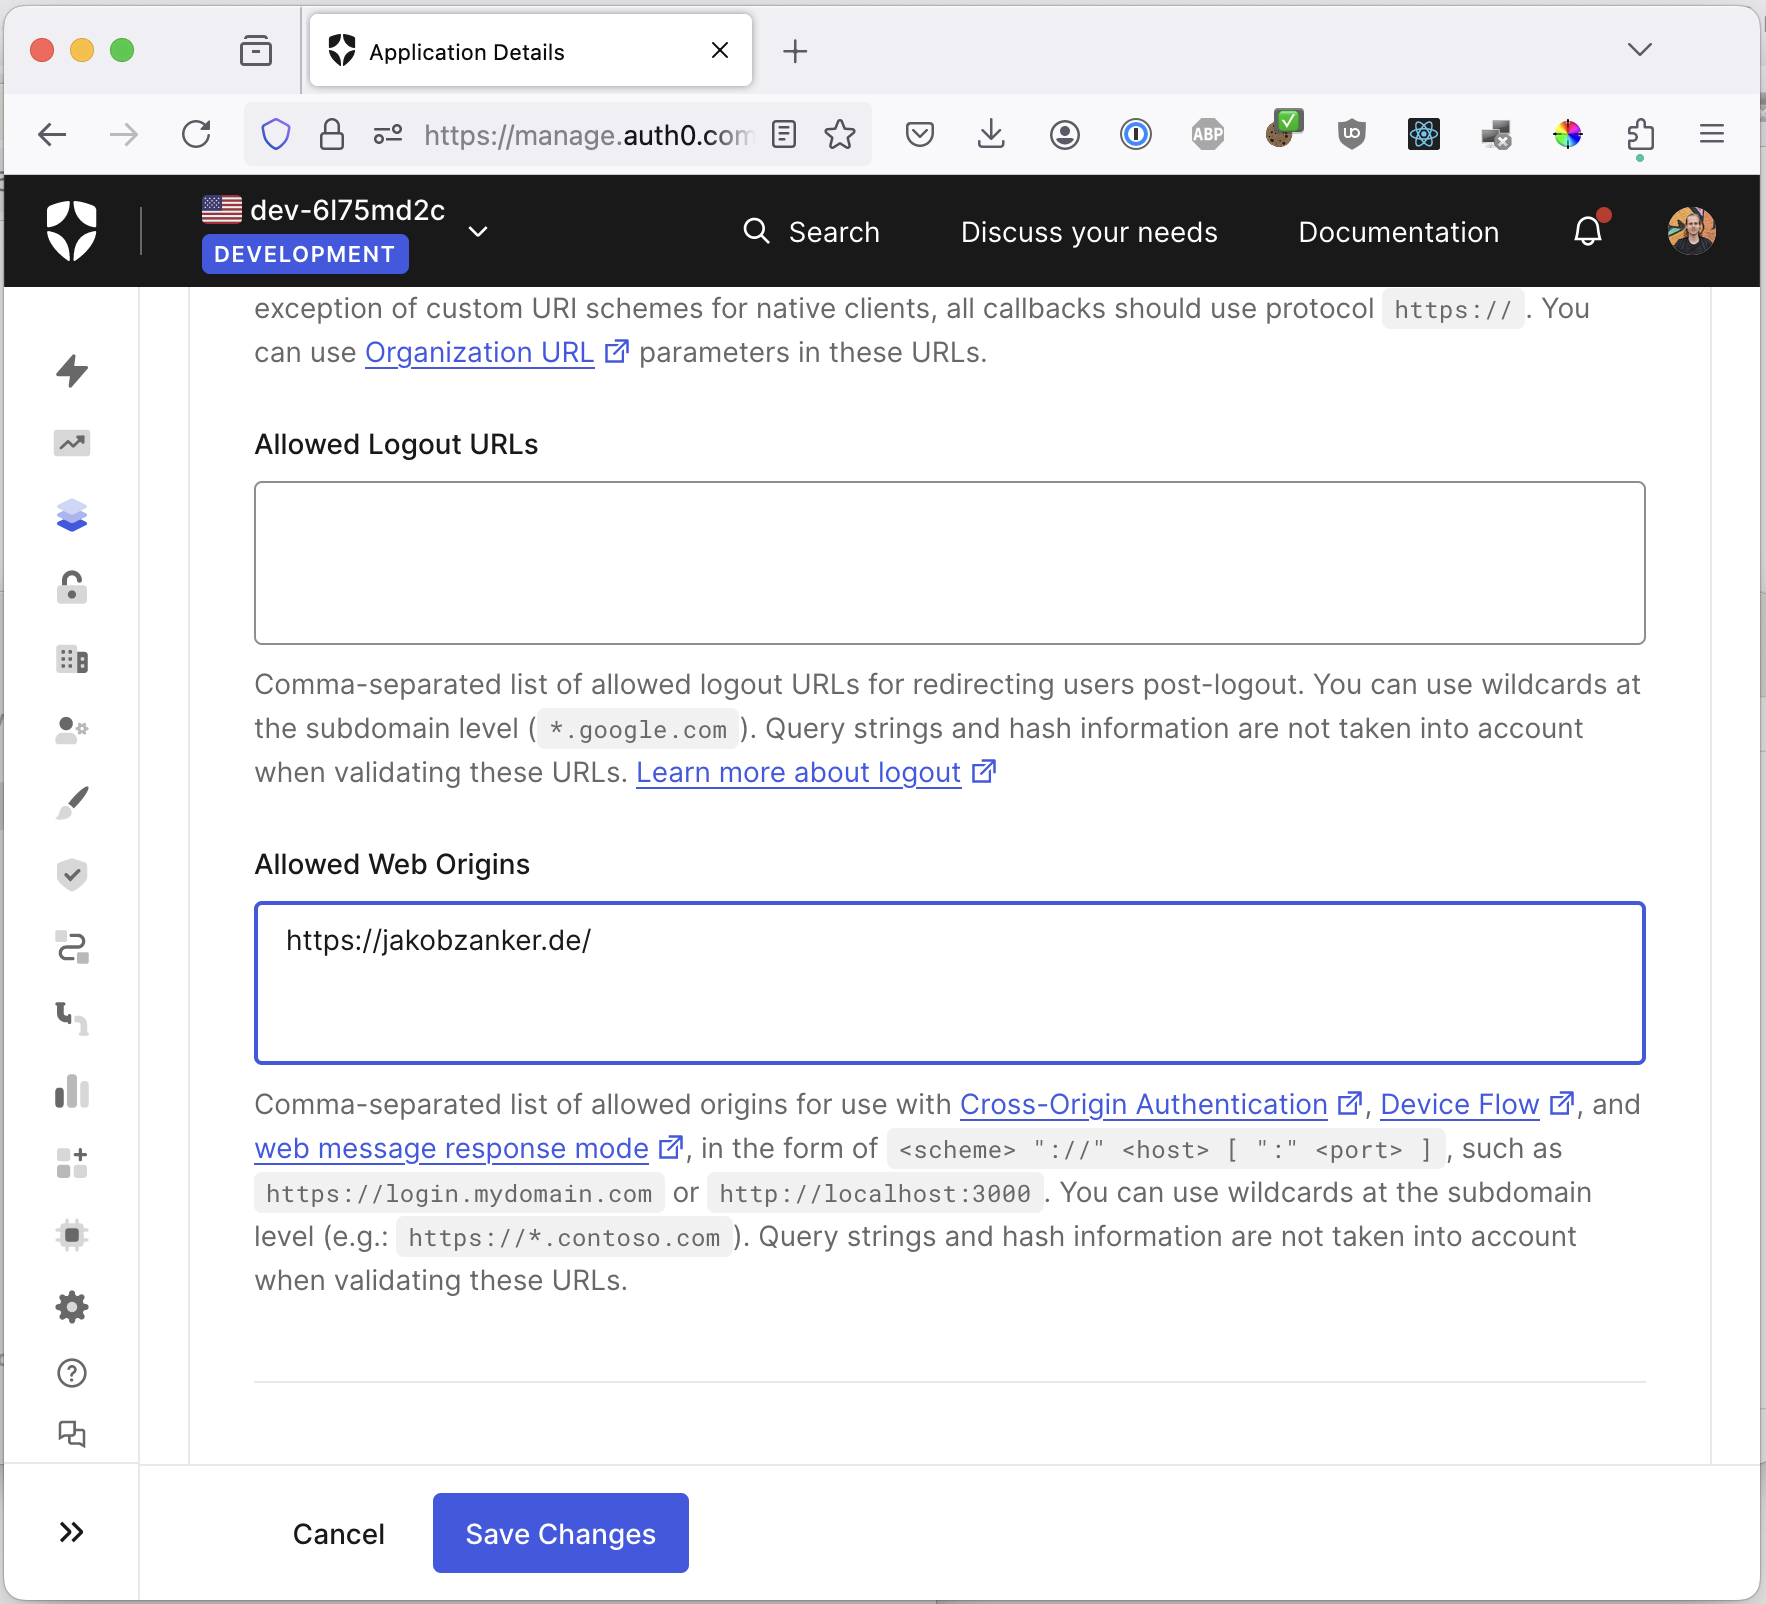
We have to configure two options:
First, the allowed origin:
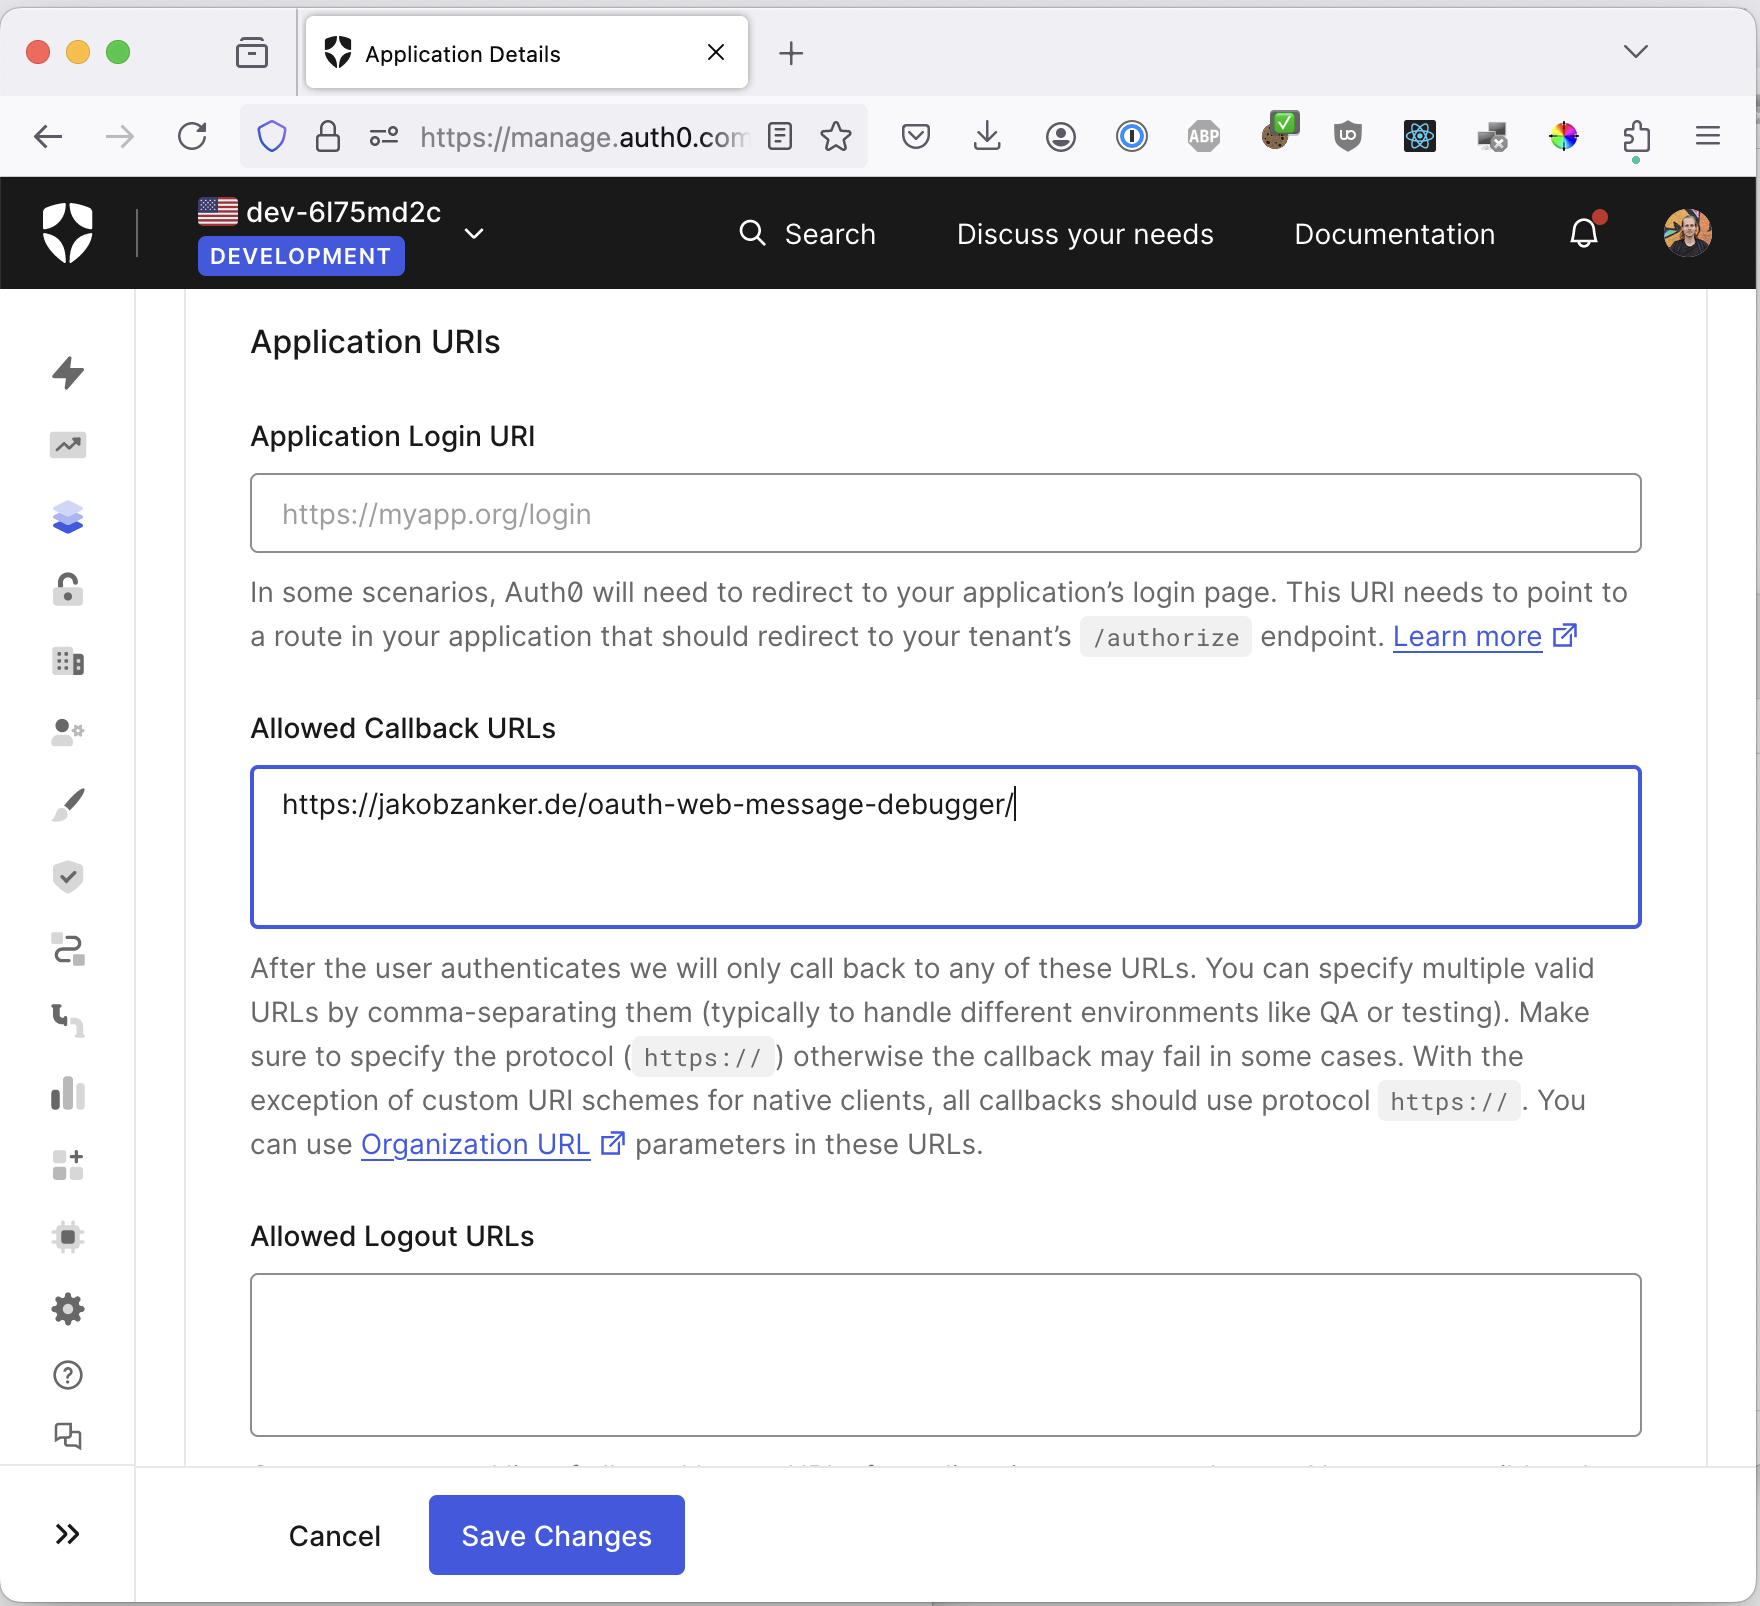
Second, the allowed callback:
Now we need to copy two values in the form of our demo application:
- ClientId
- Application Url
- The redirect url

Clicking the “authorize” button opens the url in the popup:
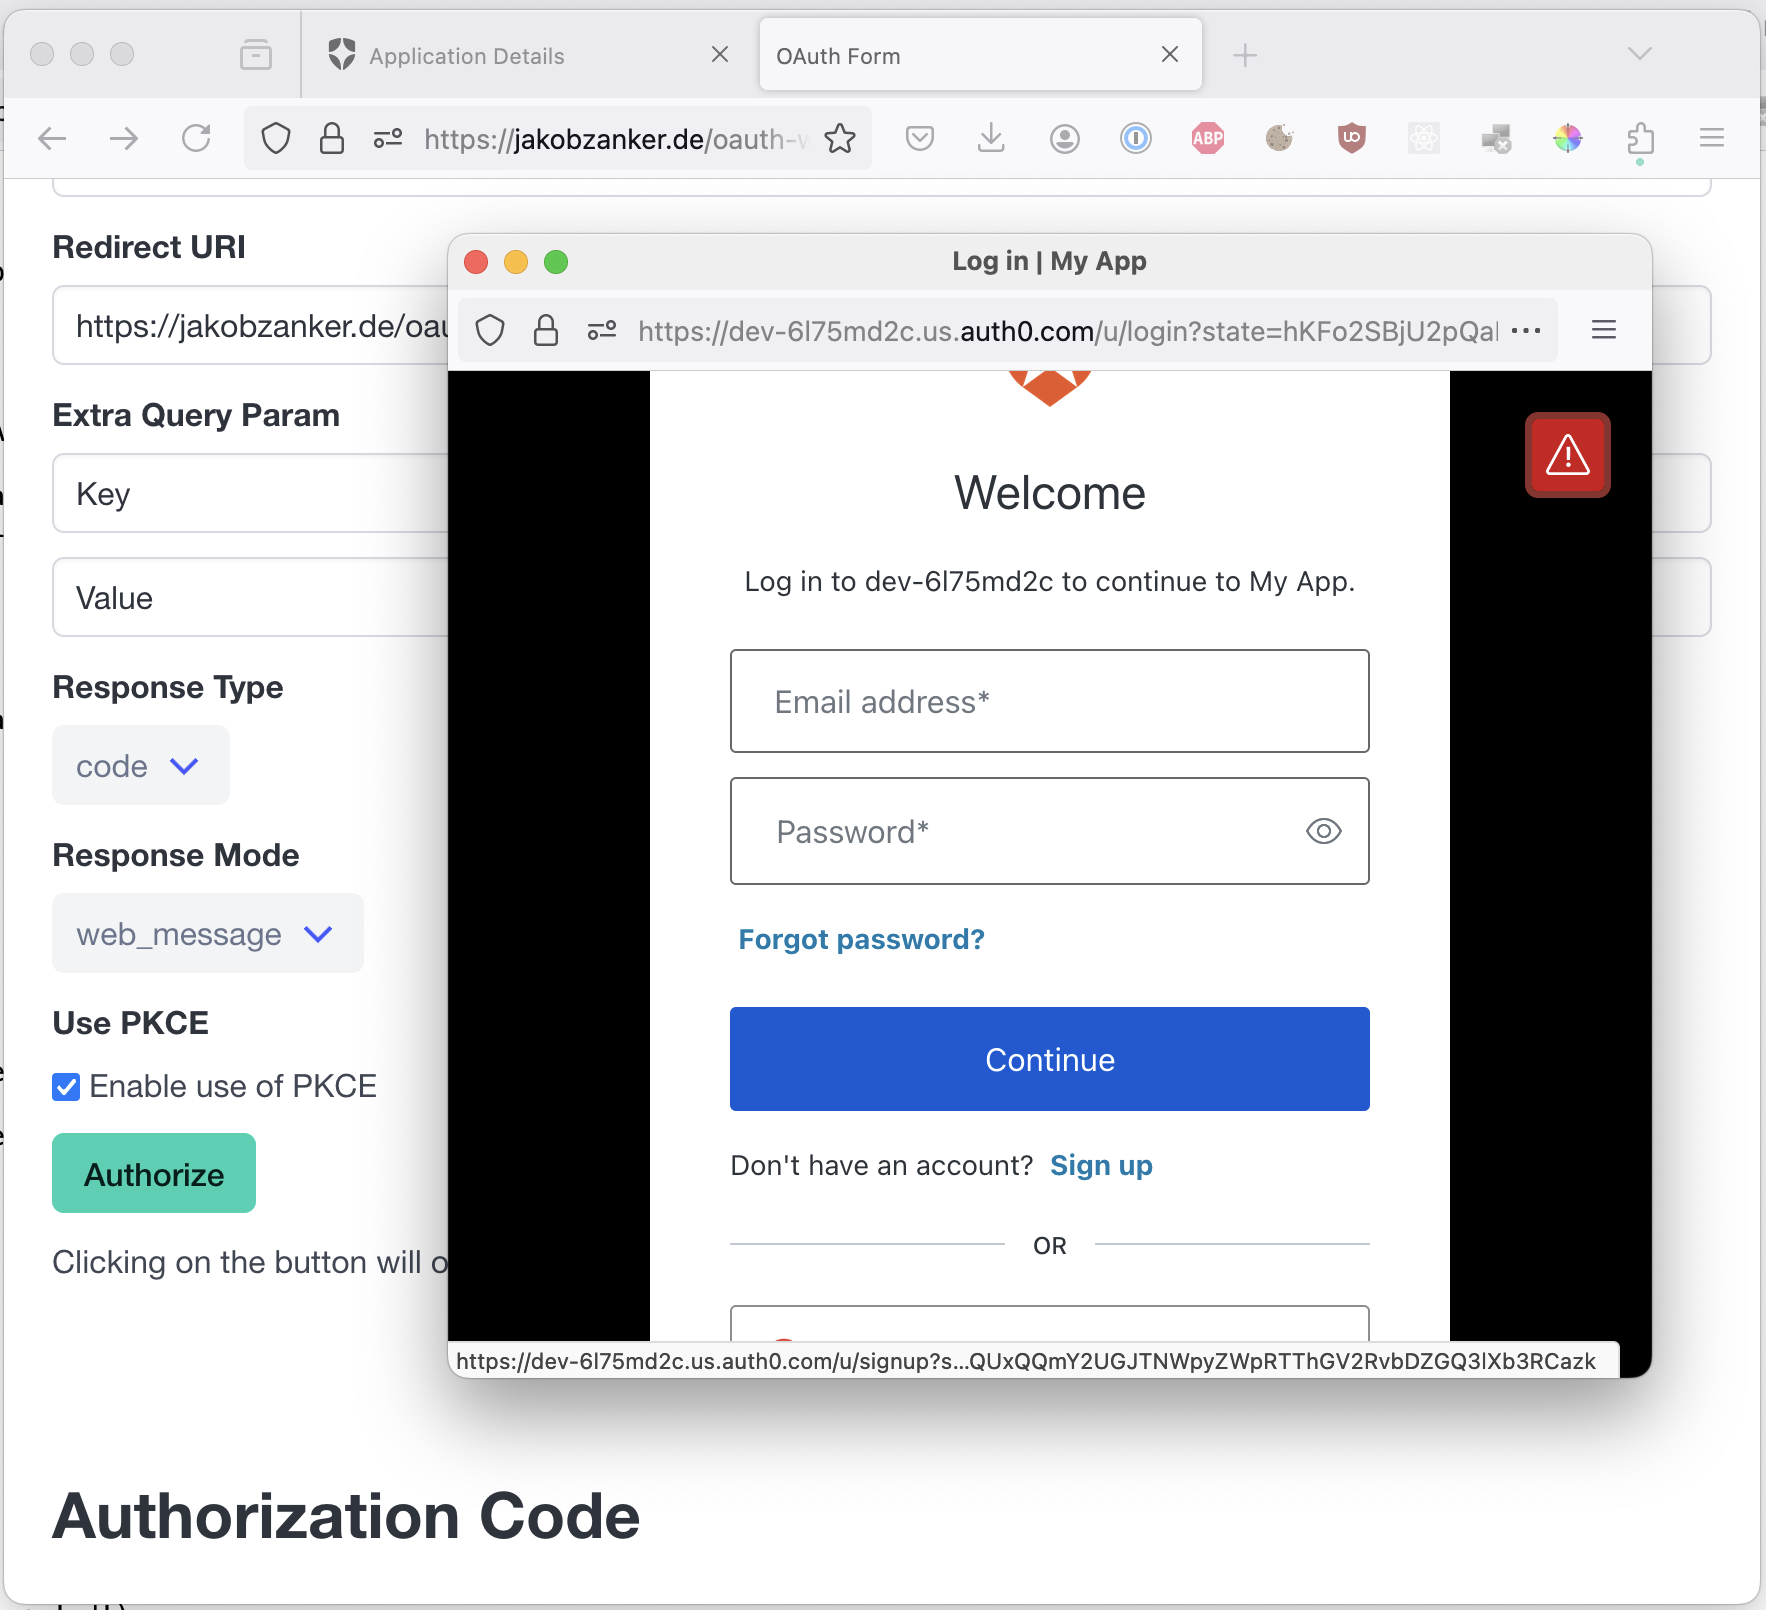
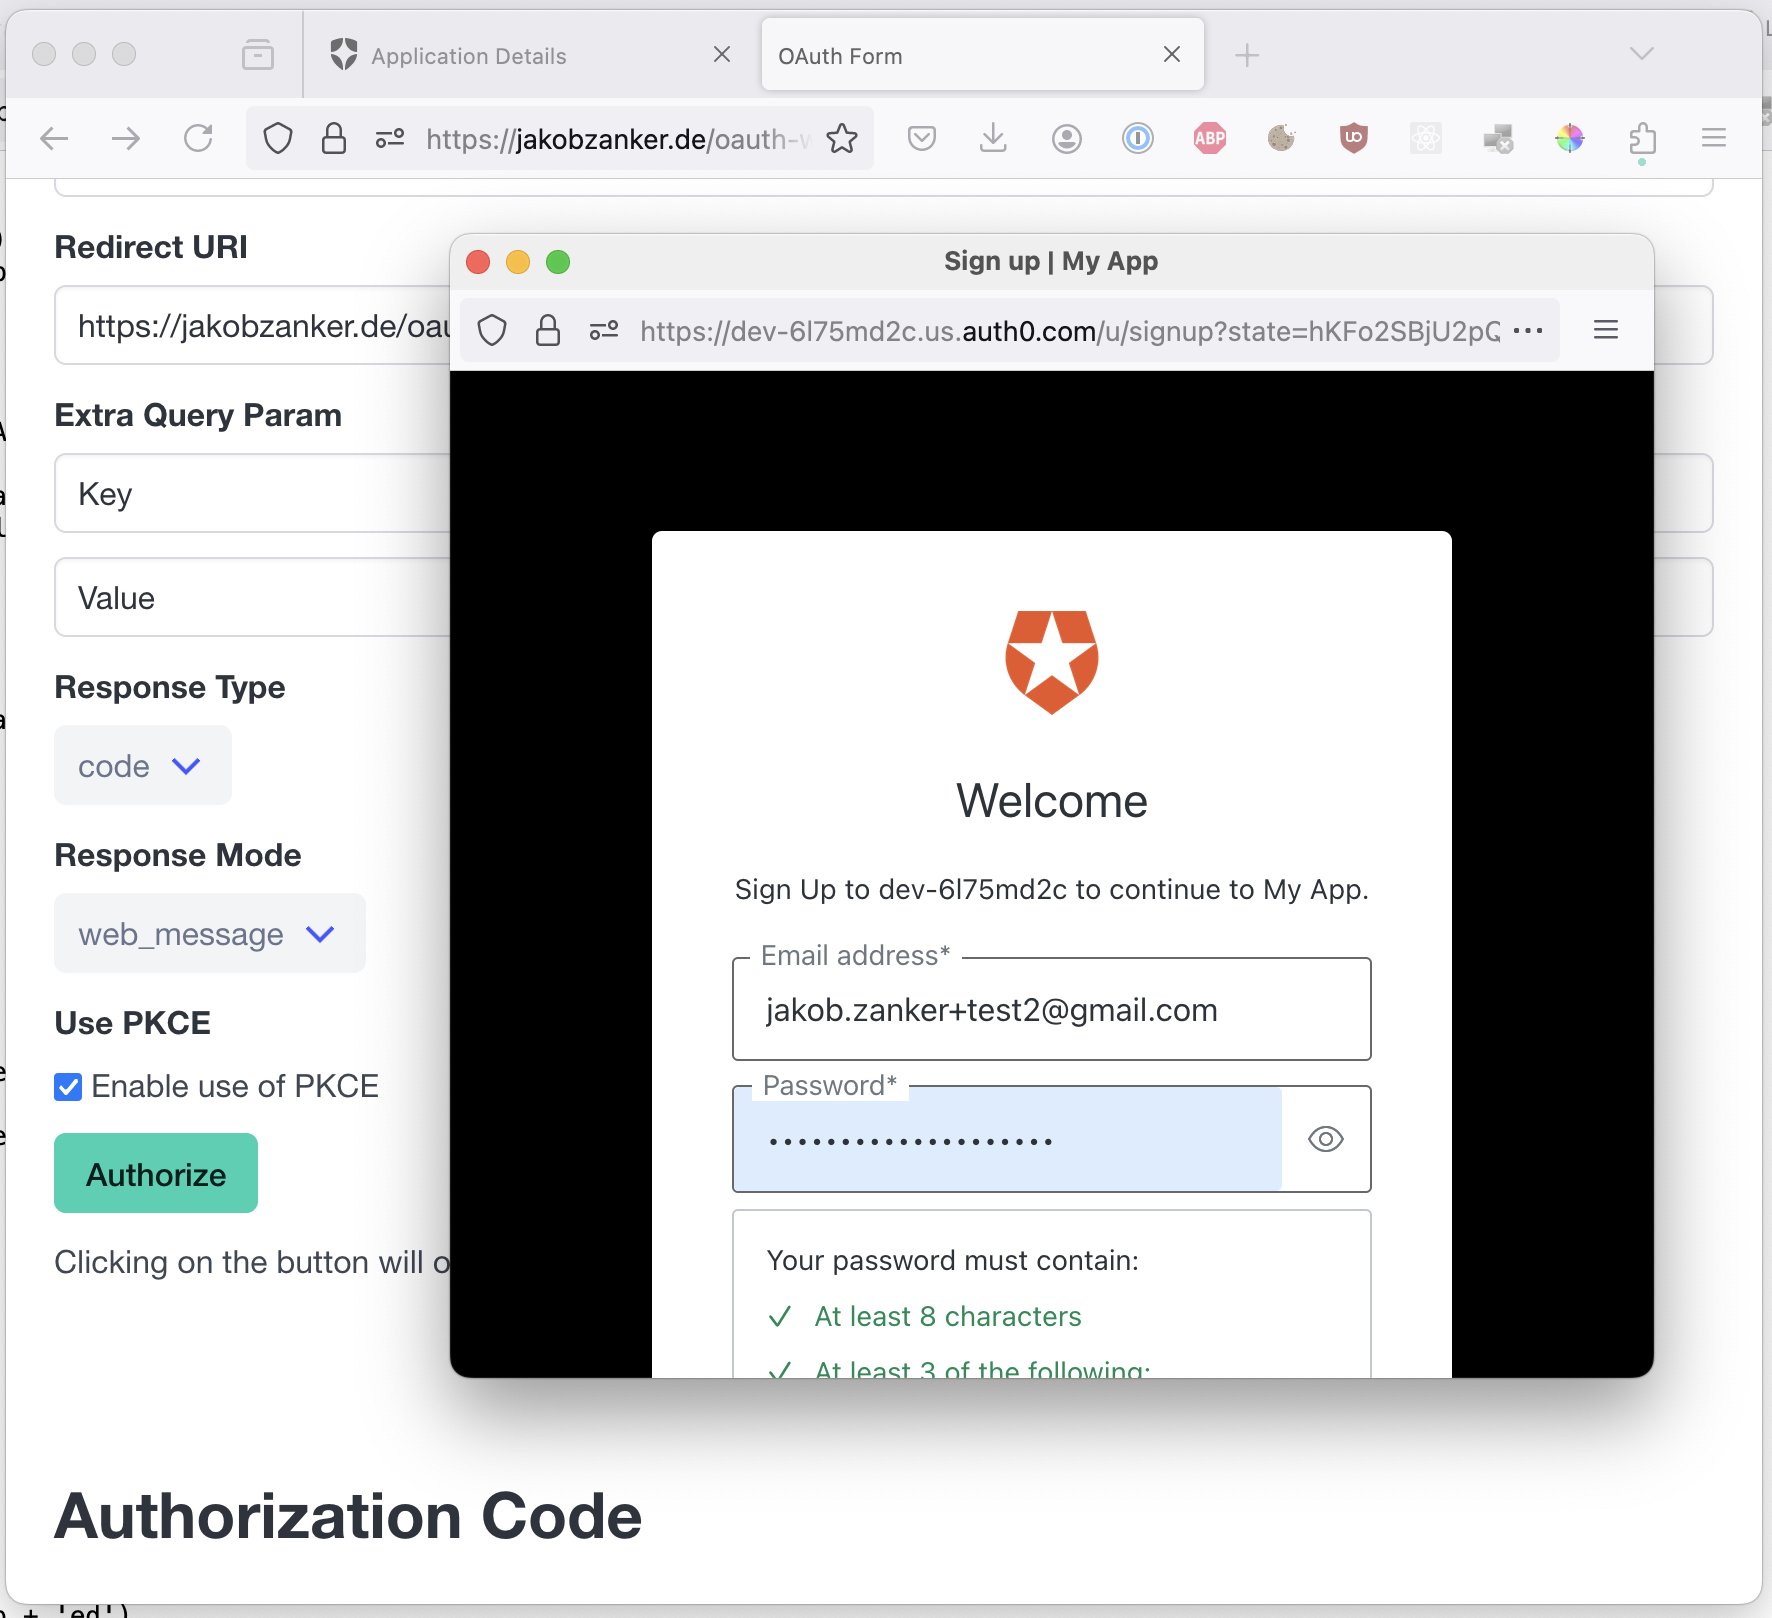
We can register a new user:
After we finish the registration, we see that our demo application received the auth code via the message event:
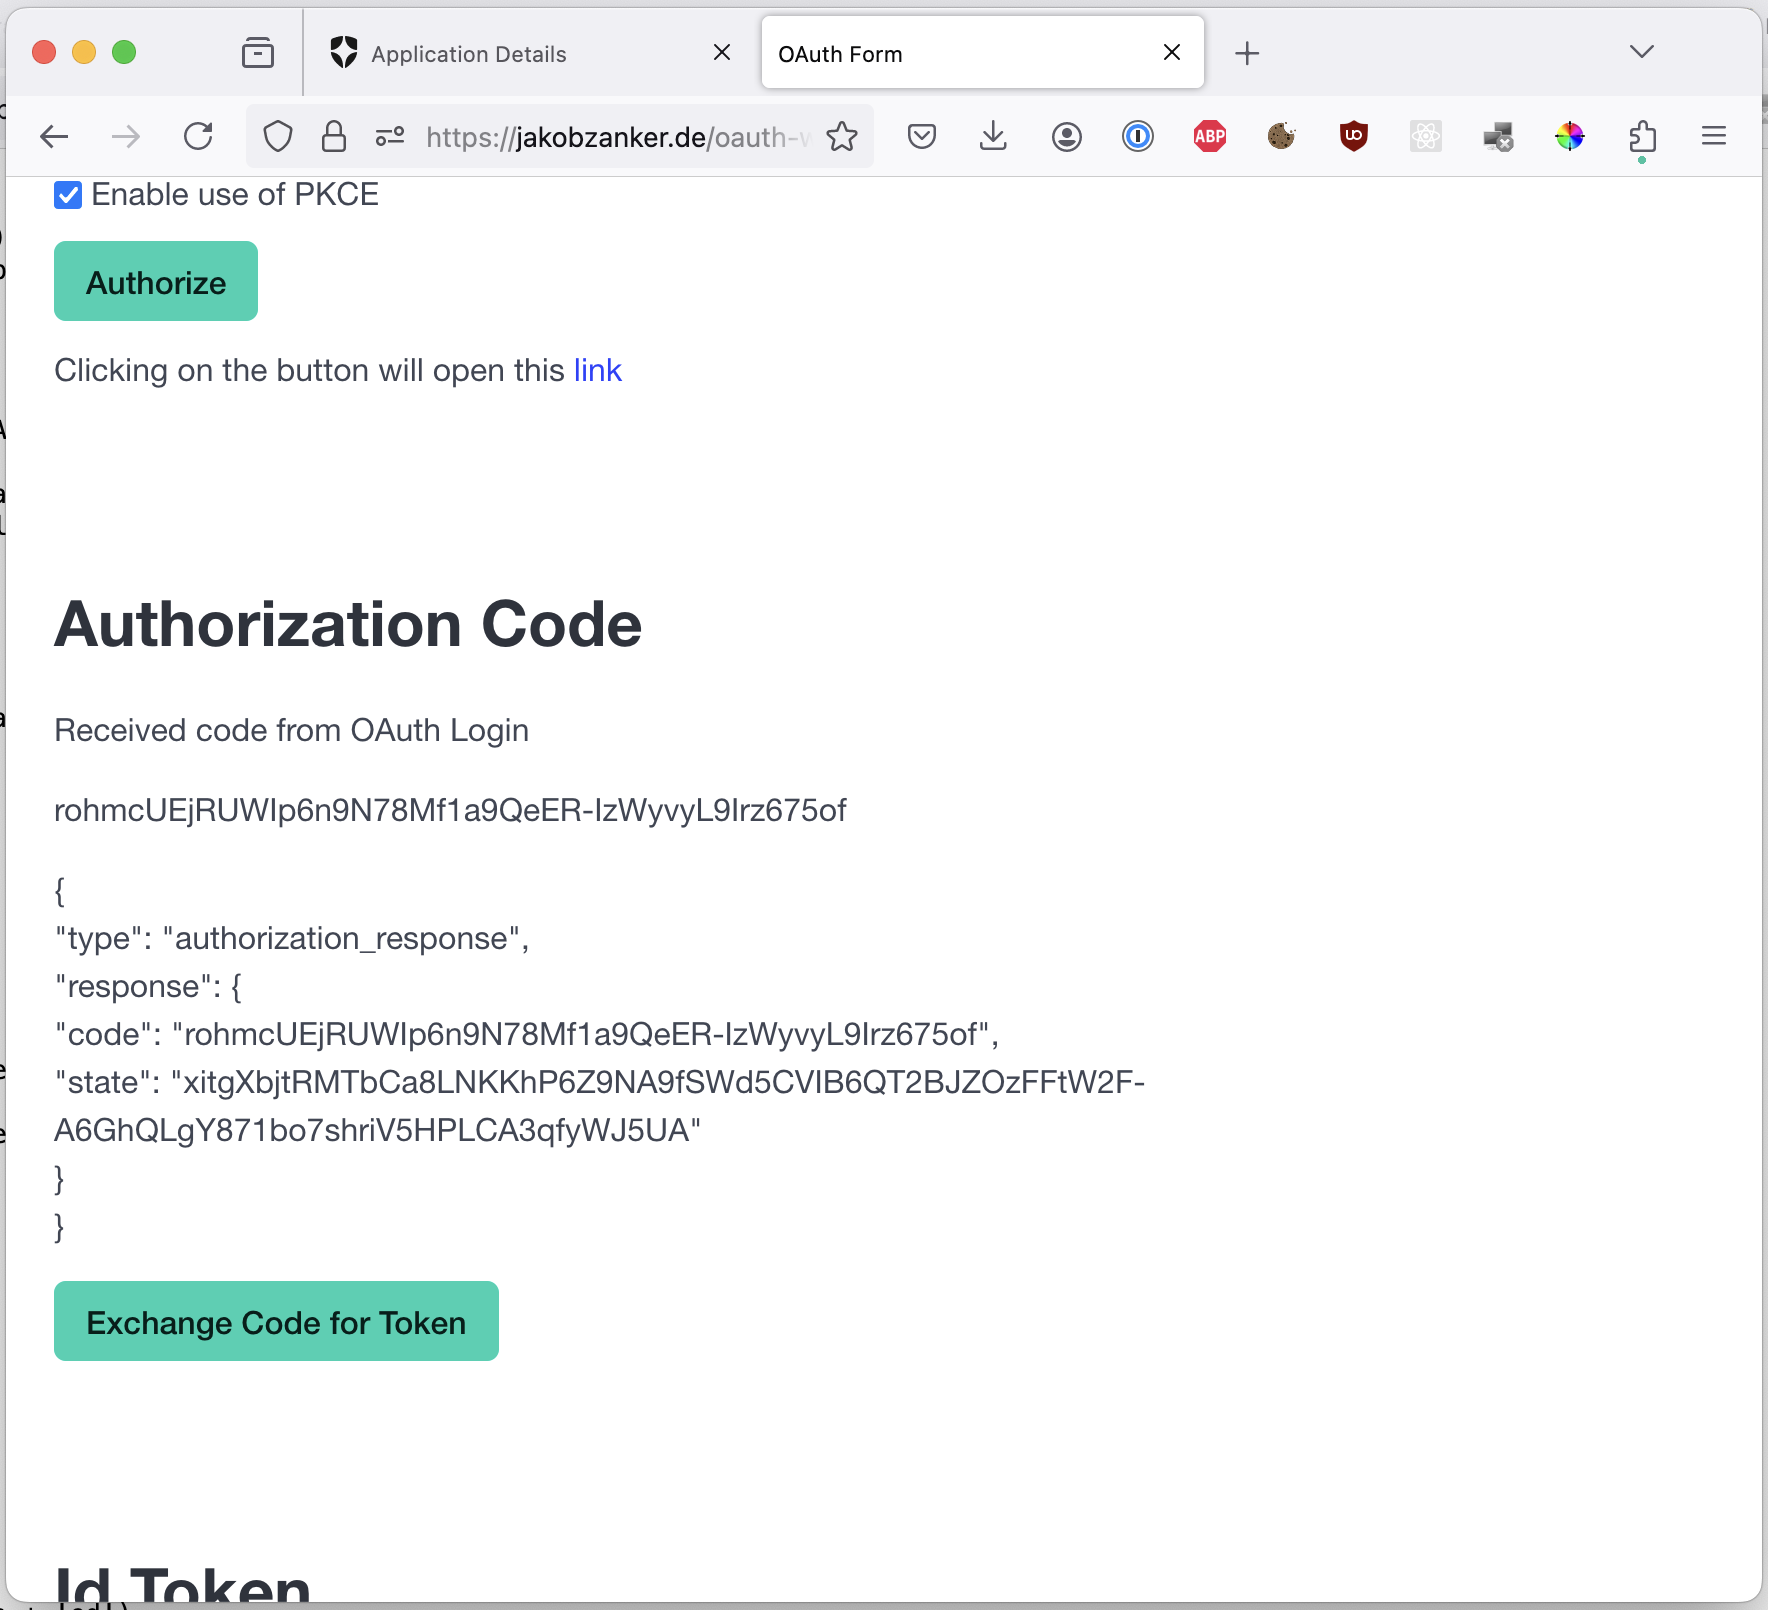
We can exchange the auth code for the id token:
And finally, parse the id JWT token to display the content:
Comparing with the Auth0 Javascript SDK
To wrap up this post, let’s compare our implementation with how the Auth0 SDK does it.
The source code for the auth0-spa-js is on GitHub: https://github.com/auth0/auth0-spa-js/blob/main/src/Auth0Client.ts
The relevant part is the loginWithPopup function.
Looking at the code, we can see that Auth0 SDK auth0-spa-js is implementing the same logic that we implemented in the demo.
First building the authorization url using response_mode=web_message
const params = await this._prepareAuthorizeUrl(
      options.authorizationParams || {},
      { response_mode: 'web_message' },
      window.location.origin
    );
Source https://github.com/auth0/auth0-spa-js/blob/main/src/Auth0Client.ts#L372C7-L372C40
Then setting up the event listener for the message event in the runPopup function:
window.addEventListener('message', popupEventListener);
Source: https://github.com/auth0/auth0-spa-js/blob/main/src/utils.ts#L136
Finally exchanging the code for the token
await this._requestToken(
      {
        code: codeResult.code as string,
        ///...
Source: https://github.com/auth0/auth0-spa-js/blob/main/src/Auth0Client.ts#L394
Summary
In this blog post we walked through the complete OAuth authentication flow for the web_message response mode.
We implemented a little demo client application and tested it together with Auth0 as authorization server.
You can find the complete code here on my Github: https://github.com/githubjakob/oauth-web-message-debugger
The OAuth demo client application is hosted here: https://githubjakob.github.io/oauth-web-message-debugger/